Mobile Profiles allow you to set up customized button layouts for the mobile application. The pages created within the Profiles appear as buttons on the app and represent the Work Types in your account. Once a Mobile Profile is created, you can then assign it to user Logins. You are able to create as many Mobile Profiles as needed. *Note: If a Work Type is not included in a user's Mobile Profile but they can access the Work Group that the Work Type is associated with, they can still view and edit work items that have been assigned to them for that Work Type.
Adding a New Mobile Profile
- Hover over the Mobile Access tab and select Mobile Profiles.

- Click on Add New Mobile Profile at the top of the mobile profiles list.

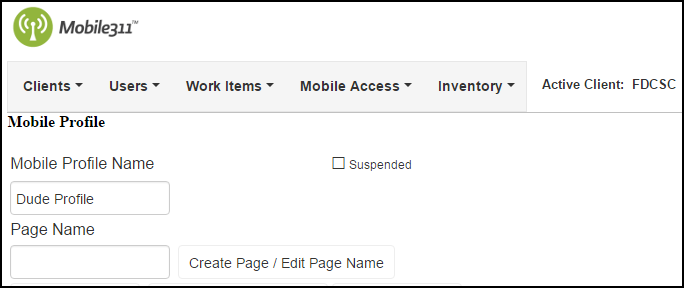
- Enter a Mobile Profile Name. Be sure to make the name descriptive enough so you will know what Profile you are assigning to users. *Note: This is a required field.
- Enter the name of your first page in the Page Name field. *Note: You can create up to six pages on the home screen of the Mobile Profile. These pages will correspond to the buttons on the mobile application.
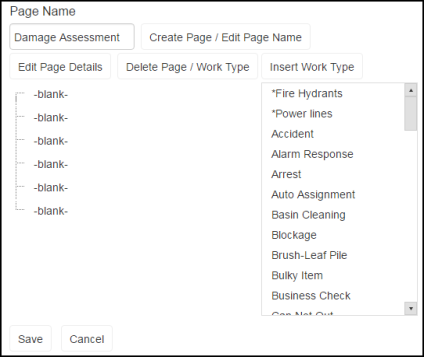
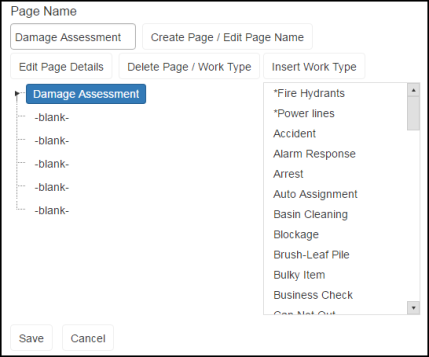
- Once you have entered a Page Name, click on the first "-blank-" field to highlight it and then click on the Create Page / Edit Page Name button to insert the page name into the "-blank-" field. This will create your first button for the mobile application. *Note: The topmost "-blank-" corresponds to the button that appears in the upper left corner of the mobile application. The second "-blank-" corresponds to the button in the upper right corner and so on. If all six pages are full, you will have two columns of three buttons each on the buttons homepage.
|
|
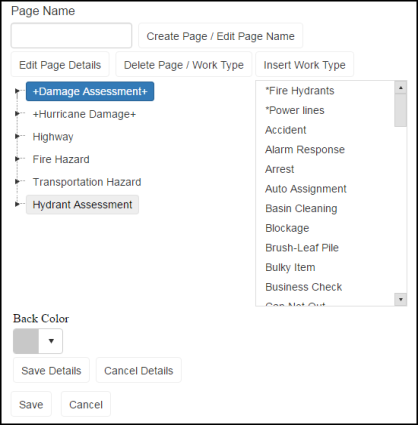
- Once you have entered all the pages that will be in the Mobile Profile, you can change the color of the buttons that will appear in the app. Click and highlight the page from the tree and click on the Edit Page Details button located below the Page Name field.
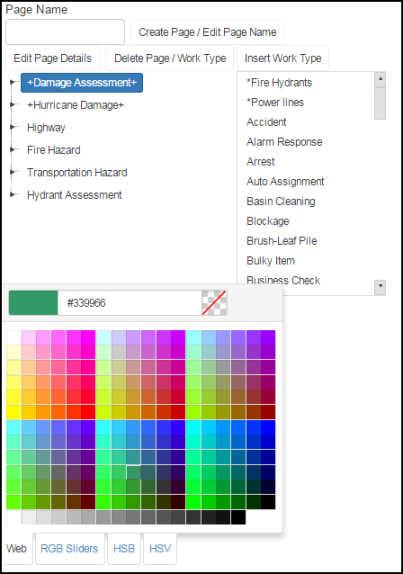
- In the Back Color drop down, select the color that corresponds with the page you have highlighted. This will be the color of the button on the mobile app.
- Click the Save Details button when you are finished.
|
|
- After you have chosen colors for your pages, you can begin entering Work Types. Click on the Plus Sign (
 ) next to one of your pages. This will open the second tier of the page tree and you will see five "-blank-" fields. This is where you will enter your Work Types. *Note: By default, you will see the word "Back" at the end of each list. This will show as a Back button on the mobile app to allow users to return to the previous button page.
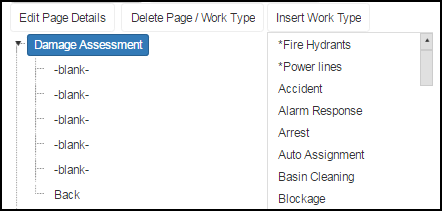
- Click on the first "-blank-" field to highlight it and choose the Work Type you want to insert from the box on the right.
- Click on the Insert Work Type button to add it to the page.

|

|
There are five "-blank-" spaces available for you to insert Work Types. If you need to add more than five, you will need to add an additional page. To do this:
- Click and highlight the fifth "-blank-" space and enter a new Page Name. We recommend including the word "More" in the name of the page. For Example: If the name of the main page is "Damage Assessment", click the fifth "-blank-" space and enter "Damage Assessment Page 2" to let the user know that when they click this button, it will take them to an additional page of Damage Assessment Work Types.
- Click on the Create page / Edit Page Name button. As with the main page, the additional page allows you to insert more Work Types and even change the colors of those using the same process as above. You are able to add as many pages as needed.
- Once your Mobile Profile is complete, be sure to click the Save button.
Assigning a Mobile Profile to a User
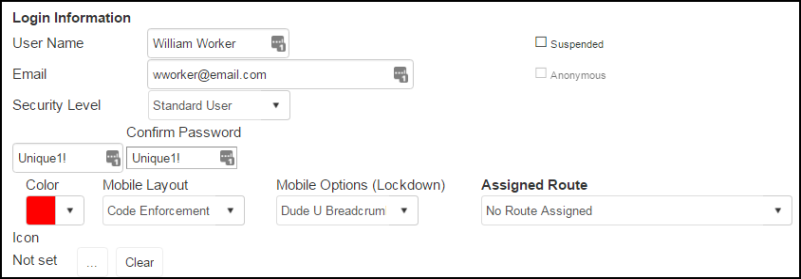
- Hover over the Users tab and select Logins.
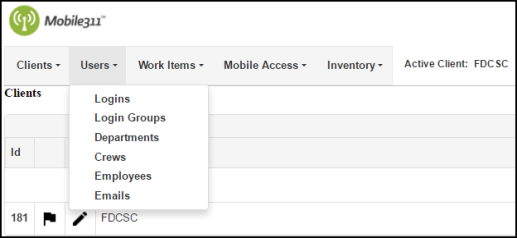
- Click the Edit button next to the user that needs to be assigned a Mobile Profile.
- On the Logins Screen, locate the Mobile Layout drop down and select a Mobile Profile from the list.
- Click the Save button at the bottom of the page when you are finished.
Editing a Mobile Profile
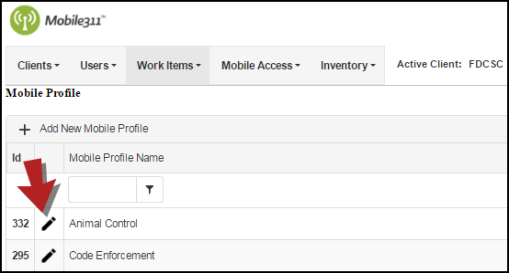
- Hover over the Mobile Access tab and click Mobile Profiles.
- Click the pencil icon (
 ) next to the Mobile Profile that needs to be edited.
- To rename a page, click and highlight the page from the tree and enter the new name in the Page Name field. Click the Create Page / Edit Page Name button to overwrite the previous name.
- To delete a page, click and highlight the page name from the tree and click on the Delete Page / Work Type button.
- To change the order of the Work Types in the list, you will need to delete and re-add them in the order you would like.
- Once you have made any necessary updates, click the Save button at the bottom of the page.

Suspending a Mobile Profile
If a Mobile Profile no longer needs to be used, you have the option of suspending users cannot be assigned it to and cannot see those buttons on the mobile application.
- Hover over the Mobile Access tab and select Mobile Profiles.
- Click the pencil icon (
 ) next to the Mobile Profile that needs to be suspended.
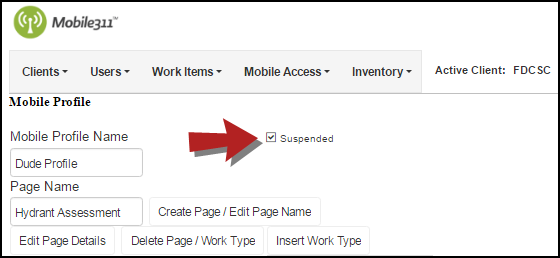
- Check the Suspended box at the top of the page.
- Click Save when you are finished.
